Friday, August 23, 2013

New way of making cards...

Hi friends!
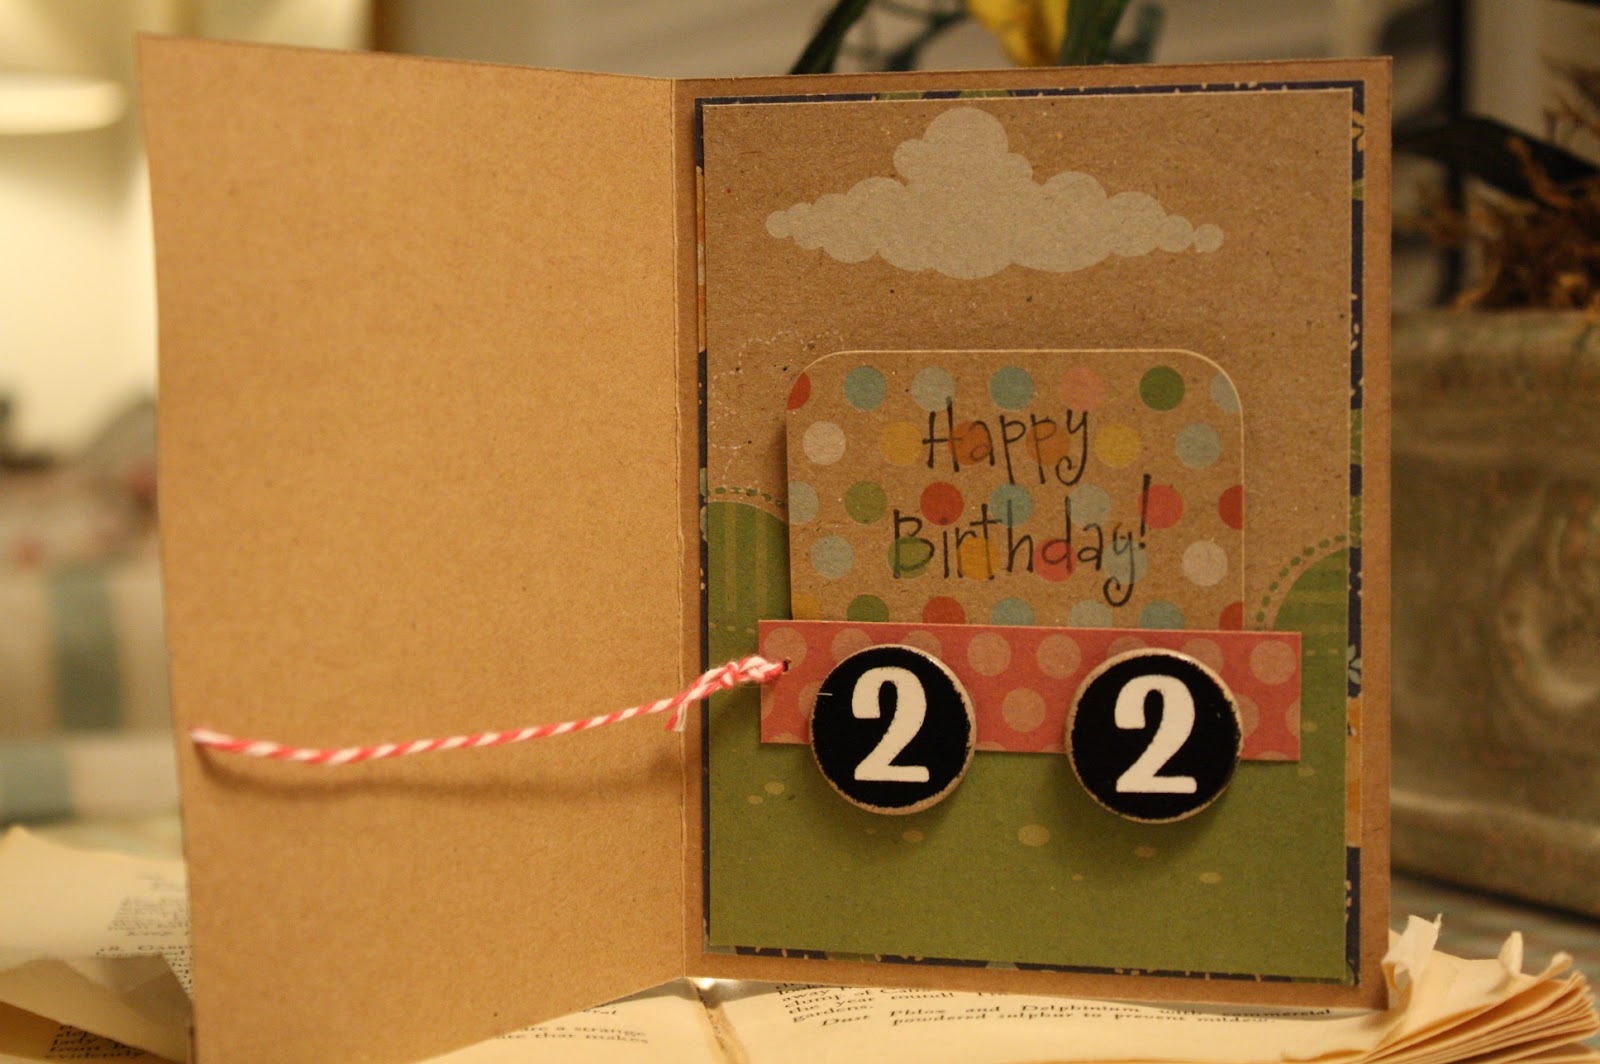
Did that pique your interest? Being the crafty frugalista that I am, I'm always scouring dollar stores and the clearance sections of office supply stores and big box stores. I popped into the Michaels near work the other day and found a 50 piece set of Recollections 3x4 Journaling Cards for a mere $2. (Did I forget to mention that there were 4 different sets of 50 cards for $2 each?) I've been collecting similar Project Life cards enough that I reasoned there have to be more ways to use them than just in albums. See this previous post for other ideas I've come up with. Today's idea is to use them on greeting cards. One of the sets is birthday themed so it's natural to use them on cards. I made this card for my niece using Amy Tangerine's Sketchbook 12x12 pad (I got that at TJ Maxx for $5.99), Tim Holtz' Ideaology Paper Stash Pad, Paper Smooches' Birthday Buddies stamp set, Lawn Fawn's A Birdie Told Me stamp set and matching die and Spectrum Noir markers. The pink card is one of 10 styles in the 50 piece set so I have 4 more to use on other cards. It's fast and easy to add a little pre-made item to a card.

Here's another one I made the other day for a co-worker using an old Unity stamp set (the owl) and the same paper pads.


Oh and those envelopes? I made them with the new Envelope Maker by We R Memory Keepers. It works like a charm.

Thanks for dropping in. For more inspiration, don't forget to visit my my friends and I at our joint blog, The Crafting Journals. I contributed the most recent post about stitching on a layout.

Have a great day!

*smile*

Saturday, August 17, 2013

Hello!

We are busy little bees over at EK Success. Working on projects for the Martha Stewart spots on HSN on Sept 17th. Mark your calendar and come watch. Lots of Halloween and Christmas/Winter inspiration throughout the day.

I may have mentioned that the Creative Design Team that I'm on has started a blog of fun crafty topics. Today was my turn to post.

Check out my installment about stitching on a layout.

I'm hoping to put a little crafting time at home soon because a friend's birthday is coming up and I have a germ of a card idea.

Have a wonderful rest of the weekend and thanks for stopping by!

Sunday, July 14, 2013

One more graduation card....


Hi! Just when you think you're done with graduation cards, you find yourself needing one more. A long-time neighbor that moved out of the neighborhood has an upcoming party planned to celebrate her son's college graduation. I knew the card had to be a little special because he grew up with my boys and there were lots of special times spent together.
That's not to say that I had a lot of time to spend on it. I remembered a paper pad that I have by My Mind's Eye called Academy. It has lots of funky school-themed papers that are collaged and embossed and glittered. I found one that has lots of nice features to it but the collage covers a large area and I didn't want to cut much of it off. So I devised a design for a 4"x9" card that would fold over to include an inner pocket for his gift check. (This size of card fits in a legal envelope.)
I pulled out my Paper Smooches set called Smarty Pants because the little professor seemed the perfect compliment to the word collage. Stamped, colored with Copics and fussy cut so that he could stand on one side. (I also stamped him directly on the card so that the pointer he held in his hand didn't have to be fussy cut. I just placed my cut out version of him directly on top of the stamped one.)
I matted the inside pocket with the same paper and added the grad's name with letter stickers. I'm glad that I didn't have a second lower-case "r" because it looks cool with the upper-case one. Serendipity.
To make it even more special, I'm going to also tuck in a 4"x6" photo of him with my boys when they were toddlers and pictures from their recent high school and college graduations.
I'll add a note and call it done.


Thanks for dropping by. Hopefully, I can put the graduation stamps away now. *smile*

Thursday, July 4, 2013

Happy Independence Day!

Hi all,
We're spending the holiday with family in Texas. Looking forward to a big ol' BBQ and fireworks show tonight.
I just wanted to relay a couple of pics that I instagrammed the other day.
Backstory: I've starting taking a pile of journaling cards from Project Life kits with me when I travel. I figure that I might want to do a little journaling of pictures taken while away, while the memory is fresh. Then, I fret. But what if I want to combine my journaling on a big card? Do I really want a one picture/one journaling card approach? So I flounder. Then, while I was reading through various social media sites, I saw quotes that I liked and interesting passages from articles I was reading. And book suggestions. So, I decided that those lonely little cards that traveled with me here had a new purpose. I jot things down on them and figure that I will add them to a Project Life album here and there as another random decoration. I like that these notes won't be lost in the myriad of journals I buy for that purpose. They will be in albums that I expect to peruse from time to time.
So here they are. (I used cards from the Honey kit and Kraft kit, now available at Michael's and Hobby Lobby stores.)

If you're into Instagram or Vine, I post there under the pseudonym "scrapcollectr."
On Pinterest, you'll find me as "Cee Cee Wallach." I've got lots of interesting boards for crafters to follow there.
Thanks for dropping by.
I'll be relaying the same info over on The Crafting Journals blog. Stop in there from time to time. We try to inspire over there, too!
Happy 4th. Stay safe!


Sunday, June 2, 2013

A winner over at The Crafting Journals


Hello,

One graduation down, one to go. Stopping in today to announce that we chose a winner for my little mini book over at The Crafting Journals. Are you curious? Come check it out.

Once these graduations are behind me, I'm going to make time for the ol' blog. I do love keeping connected with you!

Well, maybe I can share another little tidbit with you... I have a Vine account. Ever heard of Vine? It's an app that let's you create 6 second videos to share with friends or the world. I created one for the grad cards that I've been making lately. Take a look:

https://vine.co/v/b0x7ex2MQII

Have a great week!

Friday, May 24, 2013

Remember me? *smile*


Crafty friends!

I've missed you. Between working at EK Success on their Creative Artist Team and dealing with two graduations, posting on the blog has suffered. I apologize. To top it off, seven other crafty ladies and I have formed a new blog to share lots of fun ideas with you and this week was my turn to post. I just published it and I'm revisiting a mini book tutorial that I shared with you back in April of 2011. This time, I'm offering one to a random commenter and gave lots of chances to win just by commenting in a variety of ways.

I hope you go over there and check us out.

The Crafting Journals

In the mean time, I'm going to start planning new posts here that will share some of the projects I've  helped EK create for past HSN shows. I'll try to link in the products used if they are still in inventory over there because they were fun to create with.

Hope to hear from you soon. Don't give up on me!

Have a great holiday weekend.
Love,

Thursday, February 28, 2013

Catchup on cards and new Paper Smooches

Busy, busy, busy. Aren't we all? But when you have to make a card, you have to make a card. Happened to me twice. Needed one for a friend's daughter's wedding and another for dh's birthday.


First, the wedding card... I have a cute old Quickutz die that cuts that happy couple. I love that I can cut through different papers and then assemble the couple (fine motor skills and tweezers required... Lol.) I put them on that heart frame that was made with another tool that I bought a while back and is fun to use. (Remember it?) The background was the result of using a Stampin Up embossing folder with T!m Holtz' distressable cardstock with the white core. I kept it simple with just a little delicate ribbon. It was almost too simple for me so I stamped Happy Wedding Day inside the card and threw in a few scattered silver adhesive backed dots from the $1 bin at Michaels. Their presence in the card made me smile.


I picked up some other T!m Holtz products recently when Joann's put them on sale and the tree trunk embossing folder was one of them. I paired it again with T!m's distressable cardstock and then sanded it a bit afterward for a little white to peek through. The bird and the branch are from a TH Sizzix die. The sentiment comes from Paper Smooches Birthday Buddies. (I just hand cut the little banner long enough to fold it and pop it up. Love how easy that is.)

By the way, at midnight tonight, Paper Smooches is releasing new stamps with coordinating dies (which I think is the best idea since sliced bread!) In celebration, they are running a blog hop and if you hop along you have tons of chances to win some goodies. Head over to their blog to check out what you need to do and get a little inspiration at the same time!

Thanks for dropping in....


Friday, February 8, 2013

Always late, but worth the wait

I saw this on a magnet once, so I had to buy it as a constant reminder that my heart may be in the right place sometimes... it just gets there a little late. Hee hee.

Which brings me to one of the few recent cards I've made at home. I told you that I'm working for EK Success on their Creative Artist Team, so I'm working on projects when I'm there. Doesn't leave much time or energy for other crafting, but when there is an event that can't go without a card, I put it in overdrive.

Such an event was my son's girlfriend's 22nd birthday. Sent it a day late but I like to think about another quote I found: "The deadline is the greatest inspiration." I believe that I wouldn't have made this card if I'd had more time because the theme is the lateness. Ha.


I used Paper Smooches' turtle from Party Posse (I have to tell you that it is one of a few that have been pre-stamped, pre-cut and pre-colored and are sitting in a little stash for just this purpose.) He's sitting on the latest card sketch #158 from Operation Write Home. (Sketches are another life saver when you're in a hurry.) The sentiment is from a Dollar Store stamp. (Those little impulse buys come in handy, too.) Oh and those cute little birdies are my absolute favorite stamp from a Unity kit. They never fail to make me smile. Lastly, the wonderful papers are from DCWV's Playtime stack.

I have Mr. Turtle pulling a wagon with the sentiment on the inside. The wheels are from my numbers stash. Cute, huh?

Thanks for dropping by. We are experiencing a blizzard here in the Northeast today and I'm hankering for a little crafting on this cozy day, so maybe the next post won't be so far off.

Oh and I just discovered an iPhone app called Vine. Have you? I don't have an iPhone yet, but I got the app on my iPad. Unfortuantely, it doesn't have a camera so I can't play along yet but it is fun to see this new 6 second video sensation. Check out Claudine Hellmuth's videos. So cute!

Til next time, *smile*

Sunday, January 27, 2013

Altered Brush Project

Hello,
I had the pleasure of taking some mixed media classes with the one and only Donna Downey recently and it inspired me to work on and finish the altered brush project that I'd signed on for last summer. You can read about the project on the Donna Downey Studios website: go to her blog. I hope you choose to participate. She posts pictures of the ones she gets back, so there's your chance at being published. *smile*. I just mailed mine on Friday, so I'm hoping when she gets back from her world travels, she'll put it up on her blog.


When I ordered the paintbrush I knew what I wanted to do with it. I'm not sure if it qualifies as mixed media but it certainly was "altered" with paint, yarn and beads, so maybe? She's a hula girl. The bristles looked to me like a perfect grass skirt. Hula girls are stereotypically voluptuous so I went with it. She has a top cut from flowered fabric, I made her lei with beads and paper flowers and her hair was made with eyelash yarn and a tassel making tool. She even has a belly button and a word tattoo on her hip. It came together easily after the layers of gesso and tan and green paint, thanks to my trusty glue gun.

Hope you enjoyed the peek. So glad that is off my to do list!

Have a nice week!

Tuesday, January 22, 2013

Hi all!

Nothing like late notice....

Tomorrow (Weds, Jan 23rd) is the air date of Martha Stewart's segments on HSN, the Home Shopping Network. They are scheduled to air at 4am, 7am and 12 noon EST. I'm not positive, but I think the patterned paper segment is during the noon hour. If I'm right, all my projects will be on the table for that segment. Although the papers have a love theme to them, I created cards, boxes, flowers, a scrapbook layout and more with themes besides Valentines Day. I hope you have a chance to watch!

I should be able to show some pictures of these projects after they've aired, so stay tuned.

Thanks for checking in,
*smile*

Tuesday, January 1, 2013

A new year, a new card...

Happy new year to you. I've been absent because I started working as a design team member at EK Success. I go in a few days a week and work on various projects. Some are for Martha Stewart's HSN products (I will alert you later this month when we have our January show coming up.) Some are for new packaging for EK Tools. It's a dream job so I'm still pinching myself to see if I'm dreaming. *smile* I will be posting some of the projects in the near future so continue to tune in.

While on vacation though, I had to make a few birthday cards for friends so I relied on a design that is quick and easy. (A tutorial can be found in the sidebar under "Pages".) I used a pad of Recollections paper that had a nice weight and cool patterns on a kraft background. There was also nice gold embossing that added a snazzy touch to the resulting card.


I stamped the sentiment on a scrap of the solid kraft, then matted it twice and popped it up with foam squares.  I glued down the front panel on just three sides so that I could slip a gift card in the resulting pocket.

And as you can see from this angle, I used smaller pieces of the same papers for my greeting inside.


After I made my diagonal cut, I realized that if I wanted maximum exposure of the patterned side, it required folding the card unconventionally. Let's just call it serendipity.

Before I go, I just have to share some good news. I was told that this card that I submitted to my gallery last July over at Splitcoast Stampers, was chosen as one of the Favorites of 2012. I've got a big smile on my face over that fact.

Thanks for visiting!