
Hello friends!
Did you think I was long lost? Sorry, I'm over at Instagram as @scrapcollectr and I've been doing lots of posting over there. But now I'm an AdornIt Ambassador so it's my job to show you some cool projects that I make using their products and I'll be doing that here and on Instagram. Cool?
Today, I have a standing box card that I made for my in-laws 73rd anniversary! Yes, you read that right. While AdornIt has great images on watercolor paper that you can paint yourself, I chose to use their "Cut Apart" patterned paper that has images that are colored and can be cut apart into 3 inch x 4 inch panels.
Here's what I did:
1. I chose a cute flamingo theme for the cut aparts and coordinating patterned paper as a background.
 2. I chose a soft green card stock and cut it down to 5-1/2" x 8-1/2". Then cut my patterned paper into 4 panels measuring 1-7/8" x 5-1/4" each.
 3. I cut mats from the green card stock measuring 3-1/4' x 4-1/4" for each of the two images I cut out for my card. I also cut a 1" x 5-1/4" panel from the green card stock, as well as four - 1" circles.
 4. I used my DYMO label maker to create a label reading "lovebirds" (to put on the front of my card.)
 5. I used my scoring tool to score a line through the center of the 1" strip and the center of each circle.
 6. Then I scored my card panel along the long side at the following measurements: 2-1/8", 4-1/4" and 6-3/8". This creates 4 equal sections on the card.
 7. Crease at all the score lines on the card, strip and circles.
 8. Adhere the images to their green mats, and add paper tape to both sides of center line on each circle and the strip. Add "lovebirds" label to image that will be on front of card.
 9. Adhere all patterned panels to each of the 4 sections of the card base.
 10. Expose adhesive on one side of strip and start to align it with one edge of decorated card base.
 11. Adhere the card base over the strip by making sure they meet precisely at the center of the strip.
 12. Fold that flap over so that the card base will meet in a gate fold.
 13. Expose the adhesive on the remaining paper tape.
 14. Gently press down the right side of the gate fold so that it adheres to the tape.
 15. Take two circles and expose the adhesive on one side of each center line.
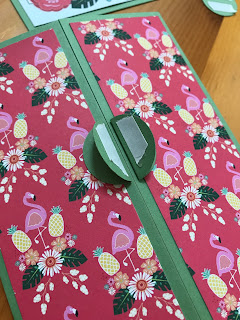
 16. Fold the circles in half and adhere each circle's sticky side to the center of the card making sure that the half circle meets the center score line of the card precisely but does not cross over the score line! This is going to be how your image will float in front of box card.
 17. Expose the adhesive on the folded circles by removing the paper on the tape, being careful that they do not adhere to each other!
 18. Take your matted image panel....
 19. ...and gently press it down onto the sticky folded circles, making sure that you place your image in the center of the card.
 20. Repeat steps 15-19 to adhere your second image that will be on the back of your card.
 21. With a gentle squeeze of the card, you now have a standing box card. Here is the front.
 22. And here is the back.
 23. Don't forget to take another sheet of coordinating paper and make a pretty A2 envelope for your card (which folds flat for mailing!) I love my We R Memory Keepers Envelope Maker for times like this!
 24. After I was done, I added a little sparkle to the front image with my Kuretake Wink of Stella pen in clear.

I hope you liked this tour. Once you've done this type of card several times, it will be so easy to whip up for all your card needs!
Be sure to check out AdornIt.com to see all the cute products they sell. You can find this flamingo line by clicking on "Papercraft" then "Paper Collections." Have fun shopping!

Did you think I was long lost? Sorry, I'm over at Instagram as @scrapcollectr and I've been doing lots of posting over there. But now I'm an AdornIt Ambassador so it's my job to show you some cool projects that I make using their products and I'll be doing that here and on Instagram. Cool?
Today, I have a standing box card that I made for my in-laws 73rd anniversary! Yes, you read that right. While AdornIt has great images on watercolor paper that you can paint yourself, I chose to use their "Cut Apart" patterned paper that has images that are colored and can be cut apart into 3 inch x 4 inch panels.
Here's what I did:
1. I chose a cute flamingo theme for the cut aparts and coordinating patterned paper as a background.


I hope you liked this tour. Once you've done this type of card several times, it will be so easy to whip up for all your card needs!
Be sure to check out AdornIt.com to see all the cute products they sell. You can find this flamingo line by clicking on "Papercraft" then "Paper Collections." Have fun shopping!


No comments:
Post a Comment